
a look at how to pull a heap of data out of a Blogger blog and into a wordpress blog. Same concept applied to pulling from the Bloglines reader and into the Google reader
Monday, December 18, 2006
Wednesday, December 13, 2006

Friday, December 01, 2006
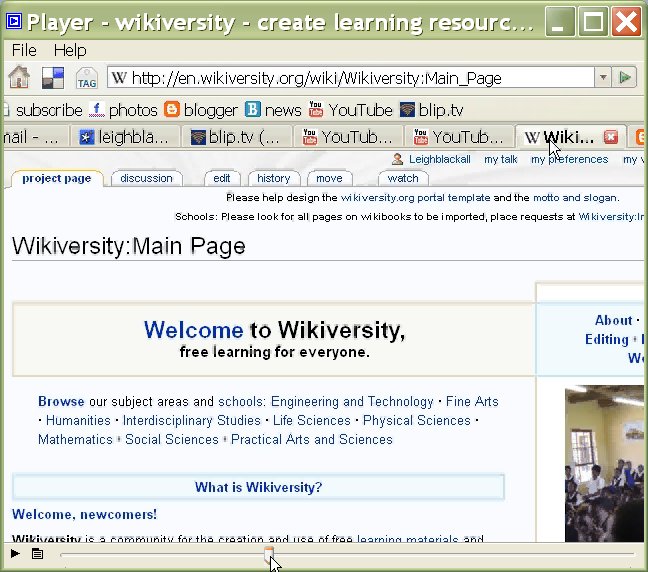
Wikiversity - Creating a course page

Creating a course page in wikiversity
1. Starting with your preferred basis for learning outcomes - such as National Learning Outcomes and Units of Competency - I like to use these standards as a starting point for creatinga Wikiversity page. I am starting with Peter Shanks progam which draws data from the Australian National Training Information Service, data out of their PDFs and RTF documents and representing it in more useful HTML and even

2. After locating the Unit Standard description, or the learning outcomes... I now go to Wikiversity to copy them across.
3. I did a search for the topic in Wikiversity and no entry close enough turned up. So I click the link asking if I would like to create this page.
 4. Pasting what I have copied, one title at a time. Being sure to place single equals around main titles (=main title=) and double equals around subtitles (==subtitle==) and so on.
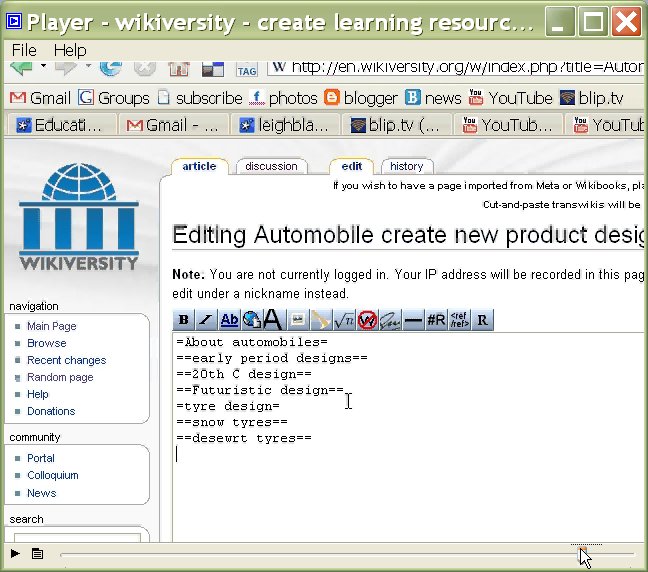
5. This has created now a contents table that links to the titles and subtitles in the page. Once the structure is in place - based on the Unit standard or agreed learning outcomes, its now a matter of entering content - which could be done with students during study times, or before the class or course starts.

Wikiversity - creating an account and profile

Creating a Wikiversity account and editing your profile
Text and image version for print below:
1. Go to wikiversity.org and click your prefered language. In this example we use English.
Text and image version for print below:
1. Go to wikiversity.org and click your prefered language. In this example we use English.

2. In the top right of the site you will see a link to login or create and account. Click that link

4. If you have already created an account you can login here. If not then click the "create an account" link just about the login fields.

5. When creating a new account, be sure to answer the math problem as this helps Wikiversity determin that you are not a program designed to automatically create accounts for advertising purposes etc. Then proceed through the next fields for user name and password. Email is optional.

6. Depending on your browser, you will be asked if you would like to have your password remembered. It is generally best practice to say no to this question as there are programs designed to retrieve saved passwords from other peoples computers. This is especially the case for Internet Explorer uses.

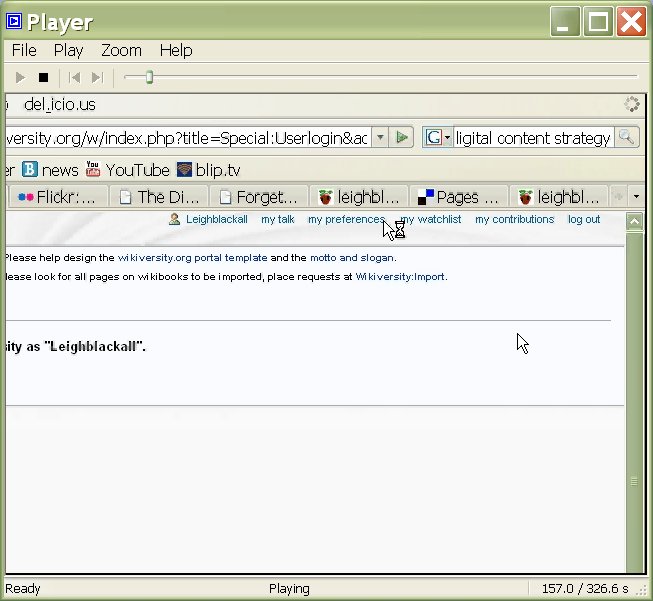
7. Now that you are logged in, the top right of the site has links to your account settings. Click the link that is your user name.
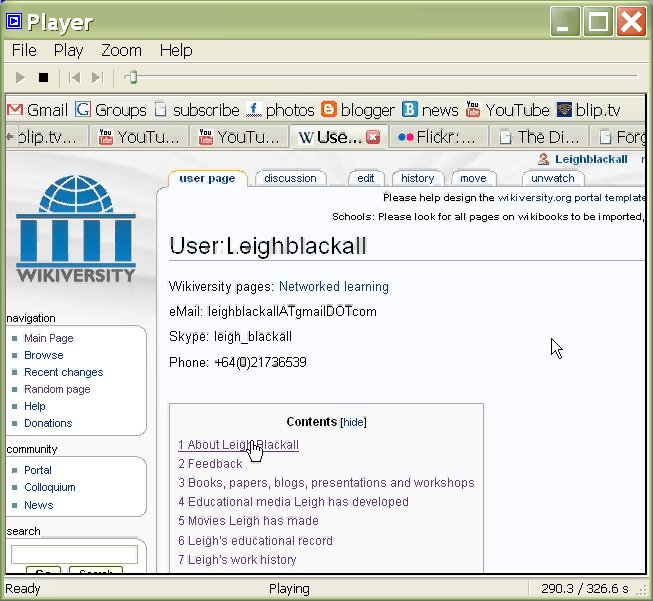
9. This is where you add your details to create a profile for yourself. Click edit to add details.

10. Type in your details. Add single equal signs either side of words you want for main headings (=heading=) , double equal signs either side of words that you want to be sub headings (==subheading==). Single square bracketts make hyper links with the link first, then a space, then the words you wish to hypertext [http://link.com hypertext]. When finsihed, click save below the edit box

11. Note that the saved version now has your headings and subheading listed in a content box. Those content items go to anchored headings throughout the rest of the page.
In the next screencast I will show how to add an image to wikiversity pages.
Sunday, November 26, 2006
Screen Hunter - a free, easy and fast way to take pictures of your screen
For a while now I've been thinking to return to the good old days of screencasting - plain old screen grabs with text. Easy to follow along to (so long as the person creating the screencast is thorough) and very portable when printed. Video is quick and easy for the creator, and handy for people who just want to get the scope of something, but when detailed step by step stuff is required (say, for complete newbies) then I think the good old screen grab is needed.
A long time ago Vivian Evans pointed me to ScreenHunter Free for Windows. I never really got into it at the time, I think I was searching for a free video screen recorder, but in my born again screengrab thinking a went and fetched it this time and boy is it light and fast. It is a free and simple little application that will initiate when the key of your choice is pressed. It will either capture the screen, an active window or a region of your choosing, then automatically turn it into either a JPG, GIFF, or BMP image file and save it where you set it to save. It makes for rapid screengrabbing compared to having to paste into an image editor.
Here's a demo:

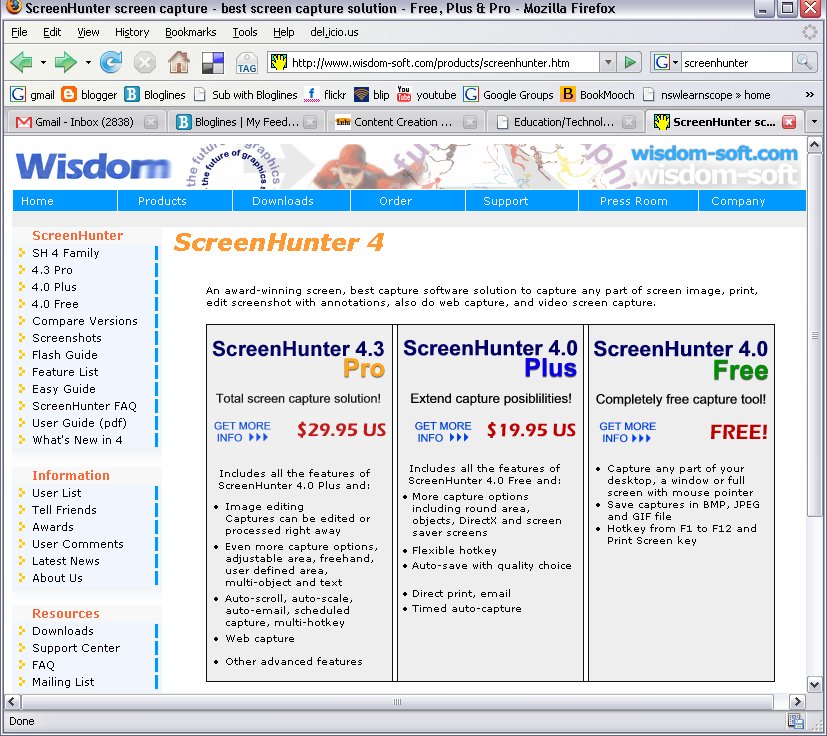
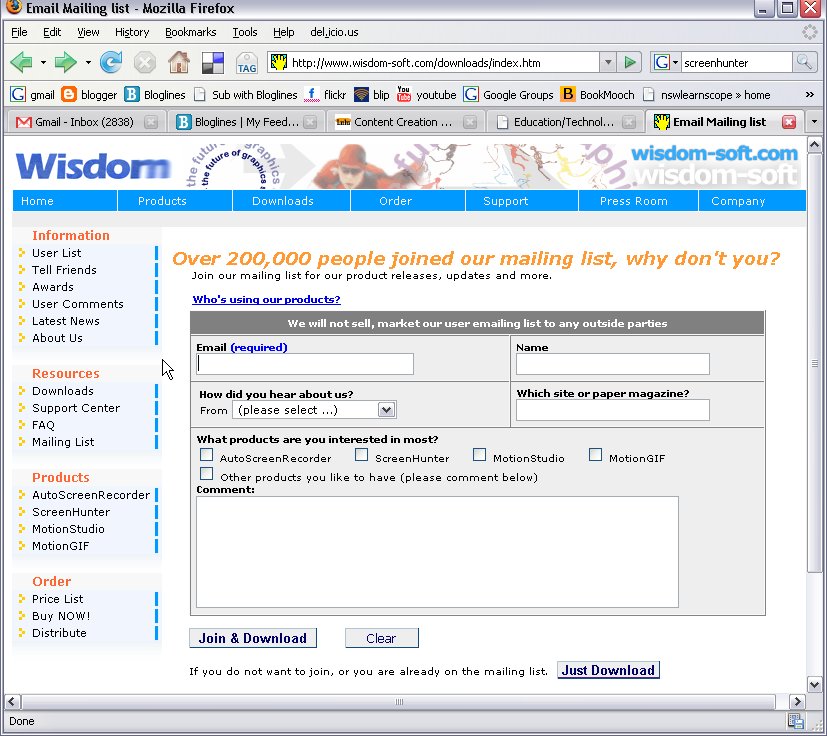
Go to the website: http://www.wisdom-soft.com/products/screenhunter.htm and choose the Free option.

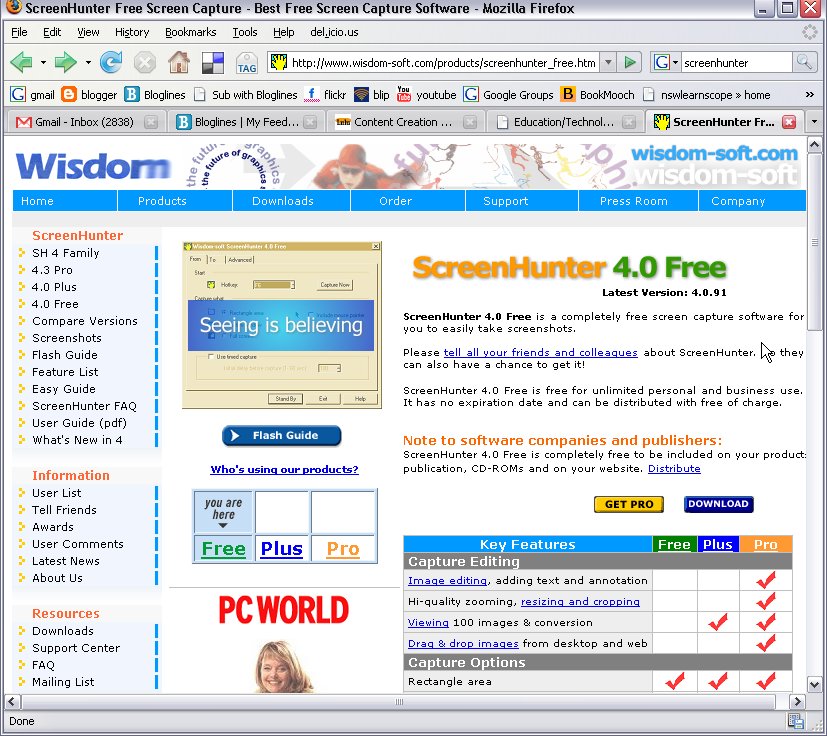
Find the little blue button for Downloading

Fill in your details (just an email address will do) and click the "join and download" button.

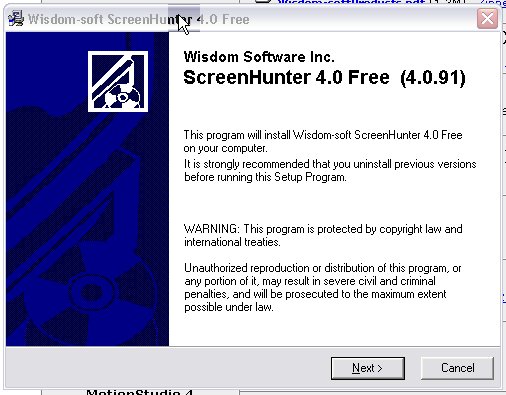
From the list of options find the option ScreenHunter 4.0 Free and click the link ending in .exe This will set your computer to download an .exe file which is generally a file for installing software. Sometimes virus software comes as exe, which is why your computer will probably ask you if you are sure you want to open the downloaded file and install the program. Just say yes and you will get a new window which is the start of the installation process.

Go through the easy steps to install ScreenHunter.
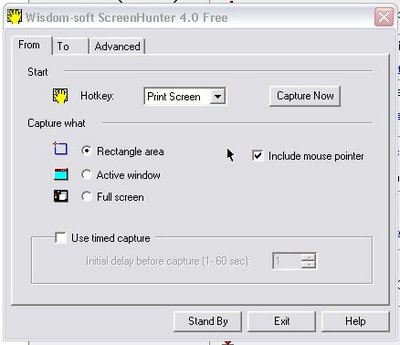
After the installation process is finished (and it is a very quick process so don't blink) you will see a window with three tabs across the top. Tab one is displaying and it is called "From". In this tab are option for you to set such as which key would you like to use when wanting to take a picture of your screen and what region of the screen would you like to picture.
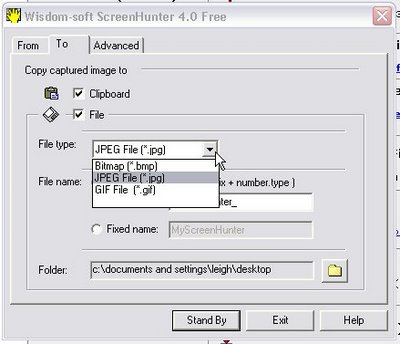
The "To" tab has settings for what type of image file you would like the picture to be saved as. I have chosen JPG which is a very common file type for pictures - especially photos. The "To" tab also has the setting for which folder you would like to send your screengrabs to. I have mine set to go to the desktop.
Once you have set up ScreenHunter, press the key you designated as the photo button and click OK when the little window pops up to confirm.
There! quick as a flash you have a series of images taken from the computer screen.

This work is licensed under a Creative Commons License.
A long time ago Vivian Evans pointed me to ScreenHunter Free for Windows. I never really got into it at the time, I think I was searching for a free video screen recorder, but in my born again screengrab thinking a went and fetched it this time and boy is it light and fast. It is a free and simple little application that will initiate when the key of your choice is pressed. It will either capture the screen, an active window or a region of your choosing, then automatically turn it into either a JPG, GIFF, or BMP image file and save it where you set it to save. It makes for rapid screengrabbing compared to having to paste into an image editor.
Here's a demo:
Go to the website: http://www.wisdom-soft.com/products/screenhunter.htm and choose the Free option.
Find the little blue button for Downloading
Fill in your details (just an email address will do) and click the "join and download" button.

From the list of options find the option ScreenHunter 4.0 Free and click the link ending in .exe This will set your computer to download an .exe file which is generally a file for installing software. Sometimes virus software comes as exe, which is why your computer will probably ask you if you are sure you want to open the downloaded file and install the program. Just say yes and you will get a new window which is the start of the installation process.
Go through the easy steps to install ScreenHunter.

After the installation process is finished (and it is a very quick process so don't blink) you will see a window with three tabs across the top. Tab one is displaying and it is called "From". In this tab are option for you to set such as which key would you like to use when wanting to take a picture of your screen and what region of the screen would you like to picture.

The "To" tab has settings for what type of image file you would like the picture to be saved as. I have chosen JPG which is a very common file type for pictures - especially photos. The "To" tab also has the setting for which folder you would like to send your screengrabs to. I have mine set to go to the desktop.
Once you have set up ScreenHunter, press the key you designated as the photo button and click OK when the little window pops up to confirm.
There! quick as a flash you have a series of images taken from the computer screen.
This work is licensed under a Creative Commons License.
Thursday, November 16, 2006


Wednesday, November 15, 2006
SuperC
Another free video encoder. It is amazing how many formats SuperC can encode to and from. A must have on your PC, ready for you-never-know-when.
This work is licensed under a Creative Commons License.
Friday, October 20, 2006
Teaching is dead - long live learning (full audio)

Slides with full audio recorded from global summit
Tuesday, October 10, 2006

Thursday, September 21, 2006

Thursday, September 07, 2006
ednamlearning

a movie of images from the image stack posted to http://flickr.com/photos/tags/ednamlearning/
for the EdNA mLearning forum
Tuesday, August 22, 2006
Using Bloglines to subscribe to podcasts and webfeeds

Webfeeds are the plumbing that makes the Internet flow in my view. Here is a brief demo of how to set up and use Bloglines to tap into that flow.

Monday, August 21, 2006
Creating an image stack with GIMP

The free and open source alternative to Photoshop is GIMP. I'm quite liking GIMP these days. Give it time, flush that Adobe hole in your pocket out of your system, and GIMP comes through with the goods. Here, I am using GIMP to create a simple image stack with layers. I use image stacks for slide show type resources.
PB Wiki

I don't use peanut butter wiki actually. I prefer wikispaces.com or a mediawiki like Wikipedia - but some people like PB
Videora iPod Convertor

How to use Videora to convert videos to the MPEG4 format ready for playback online or in a portable player like the iPod Movie
http://www.videora.com/en-us/Converter/iPod/ = the download page
http://www.videora.com/en-us/Converter/iPod/ = the download page

Audacity and LAME

The free and open source audio recorder and editor Audacity needs a little plugin before it can export files to MP3. Its a one of thing to do - but for those not used to installing software and plugins, it can be a bit tricky.. here's how.
Odeo

Odeo was a pretty cool web service where you could record audio to, and upload audio to - giving you a URL for audio blogging or podcasting. Lately though they've started adding ads in front of your audio :( if only all services could be like Blip!
Joe and Leigh on Unyte

Unyte is a little plugin for Skype that enables users to look at each other's screen. Known as application sharing it is a great way to communicate online.

Using Canstudio

Camstudio is a free and open source screenrecorder for Windows. I hope they bring one out for Linux soon. This is a demo of how to set up your Camstudio to record a region of the screen and to track your mouse. This is important if you are going to compress your video - rendering a full screen recording useless.
Saturday, August 19, 2006
Friday, April 14, 2006
Black Web Login
A quick look at logging in to Black Board courses at Otago Polytechnic
This work is licensed under a Creative Commons License.
This work is licensed under a Creative Commons License.
Black Web Announcement
Quick demo of making an announcement in Black Board
This work is licensed under a Creative Commons License.
This work is licensed under a Creative Commons License.
Subscribe to:
Posts (Atom)